
The coffee maker had been making good coffee for many years. Recently, though, it also was making puddles of water after each brew cycle. Obviously, there was a leak and potential for a catastrophic failure. Easy fix — go buy a new coffee maker. Marilee and I went on a mission to procure a new coffee maker. Doug and Jo tagged along for the entertainment value afforded by watching us select this most critical item of kitchenware.
The store didn’t have our model in stock, so I went to customer service and ordered it through their online store. Shipping was free since they didn’t have the item in local inventory. It was scheduled to arrive in a few days. We all went home happy.
Even though the replacement coffee maker was on its way, Doug pondered aloud that it might be interesting to see what the root cause of the failure might be. I saw no harm in looking, so I fetched the tools.
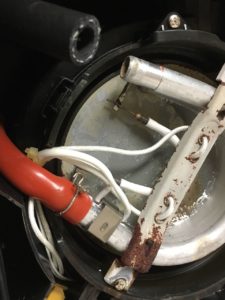
We started to disassemble the unit and found the source of the leak It was a very small split in the water feed-line. Doug and I had a short discussion about how easy it might be to remove and replace the short hose. Doug ran out to an automotive store and returned with a replacement hose thought to be of sufficient length and temperature rating for the application. Doug was not able to stay for the activities that unfold next but I certainly appreciate his contribution both in spirit (let’s investigate!) and in material support (he purchased the hose).
Now the fun begins!
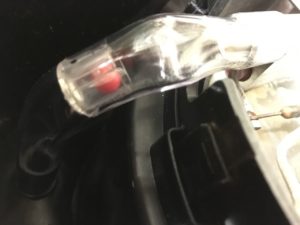
The hose provided by Doug is the correct inside diameter but the walls of the hose are quite thick and not very pliable. I manage to get one end on but the other is impossible to attach.
Not to be deterred by such a minor detail, I launch on a mission to Home Depot to find another replacement candidate. I needed a mere 7 inches but I settled for 20 feet. It’s only a few dollars. And, hey, I can always use some spare tubing around the house.
I cut the required length, inserted the back pressure lock, attached both ends to their respective ports, and I was ready to test!
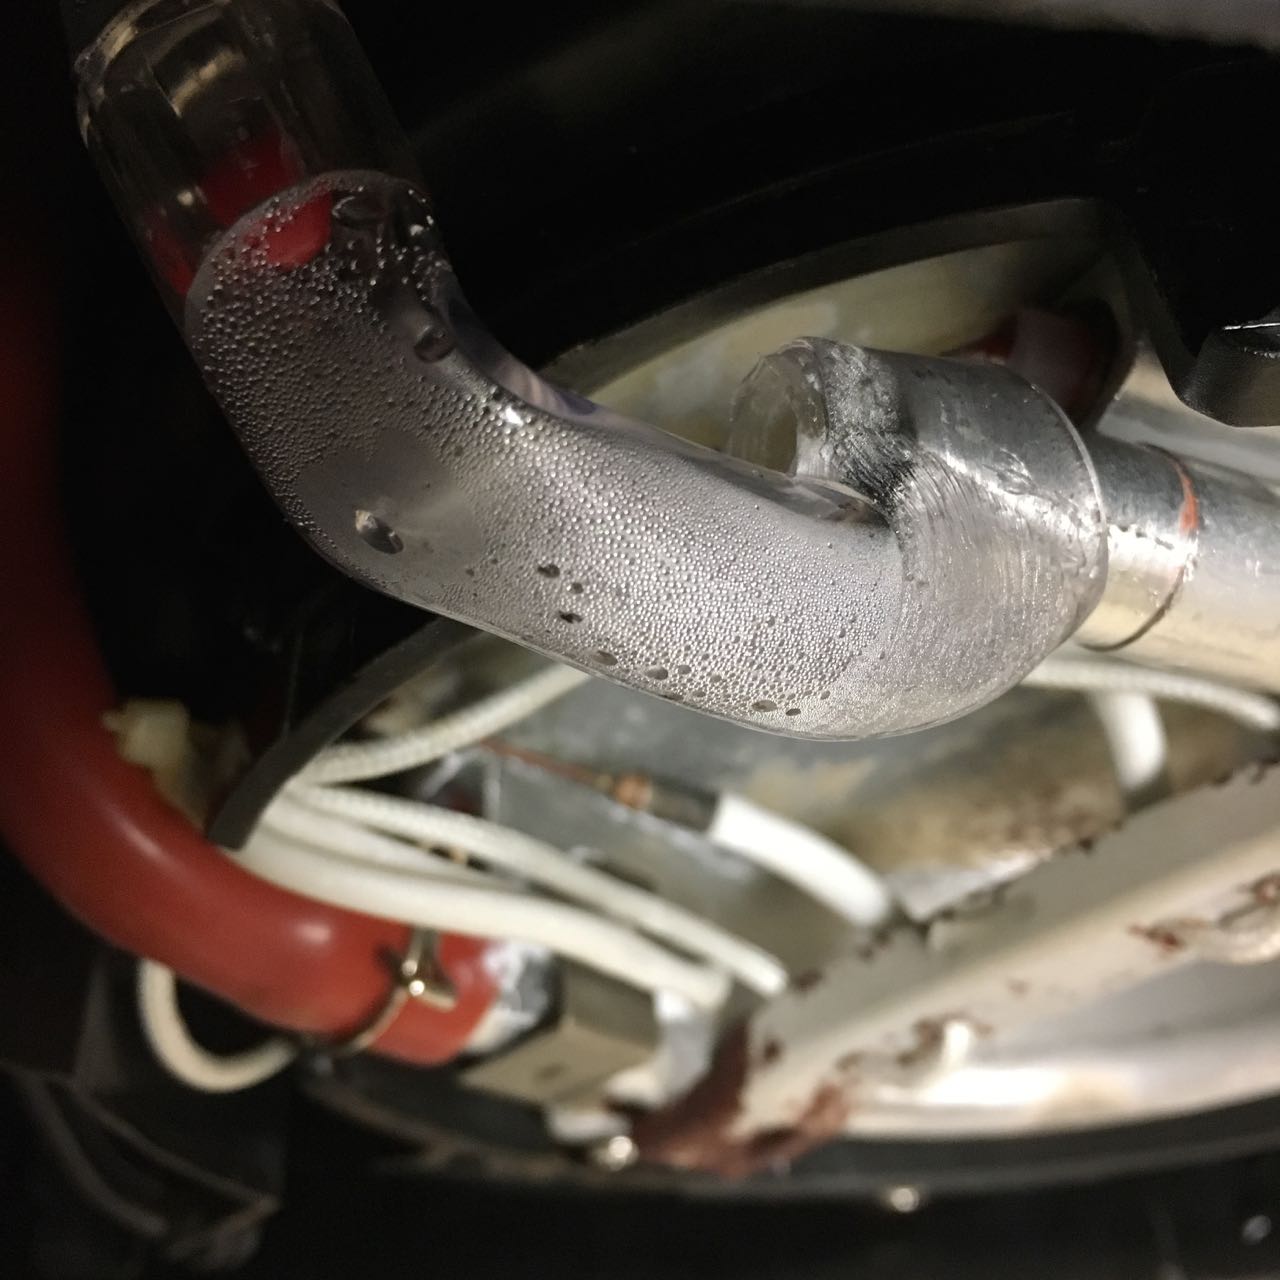
I filled the coffee maker tank with about 4 cups of water, pressed “Brew,” and waited for the magic to happen. Eureka !!! I worked !!! Um, once. The hose became extremely deformed where it attached to the feed side of the heating element.
At this point, my choices were:
1 – Replace the hose again and brew only 4 cups of coffee per coffee making session (since empirical data only supports heating 4 cups of water without making a large puddle of hot liquid midway through the cycle). Even though I have just under 20 feet of this type of hose (now), this would add significant effort to preparing the coffee maker for morning coffee until the replacement unit arrived.
2 – Decommission the coffee maker and prepare its parts for recycling.
Here are the results of my decision:
While the black rubber hose “should” have worked, there were problems (install constraints and taste). My building code vinyl tubing “could” have worked but there were problems (insufficient heat tolerances).
Sorry, Doug. It was a noble effort. Between the two of us, we covered many data points.
Those heat rating and food grade material details turn out to be stuff of real engineering. Who knew?
Well, I never claimed to be an engineer. Nevertheless, I do know how to be the “COFFEE MAKER.” Boil water and add coffee. Really. That’s it.
- Fill a pan with water and turn on the heat.
- When the water’s boiling, add your coffee.
- Remove the heat immediately, cover the pan, and wait until all of the grounds settle at the bottom — it will take 4 to 5 minutes (but I wait 8).
- You’re done: Slowly pour the coffee off the top or ladle it into cups, and you’re all set.
— Readers — feel free to share your favorite coffee making procedures for when Starbucks is closed or your electric coffee maker quits.
——————————-
Banner photo by Julius Schorzman – Own work, CC BY-SA 2.0, Link